
 AntoineAsphalt.ca
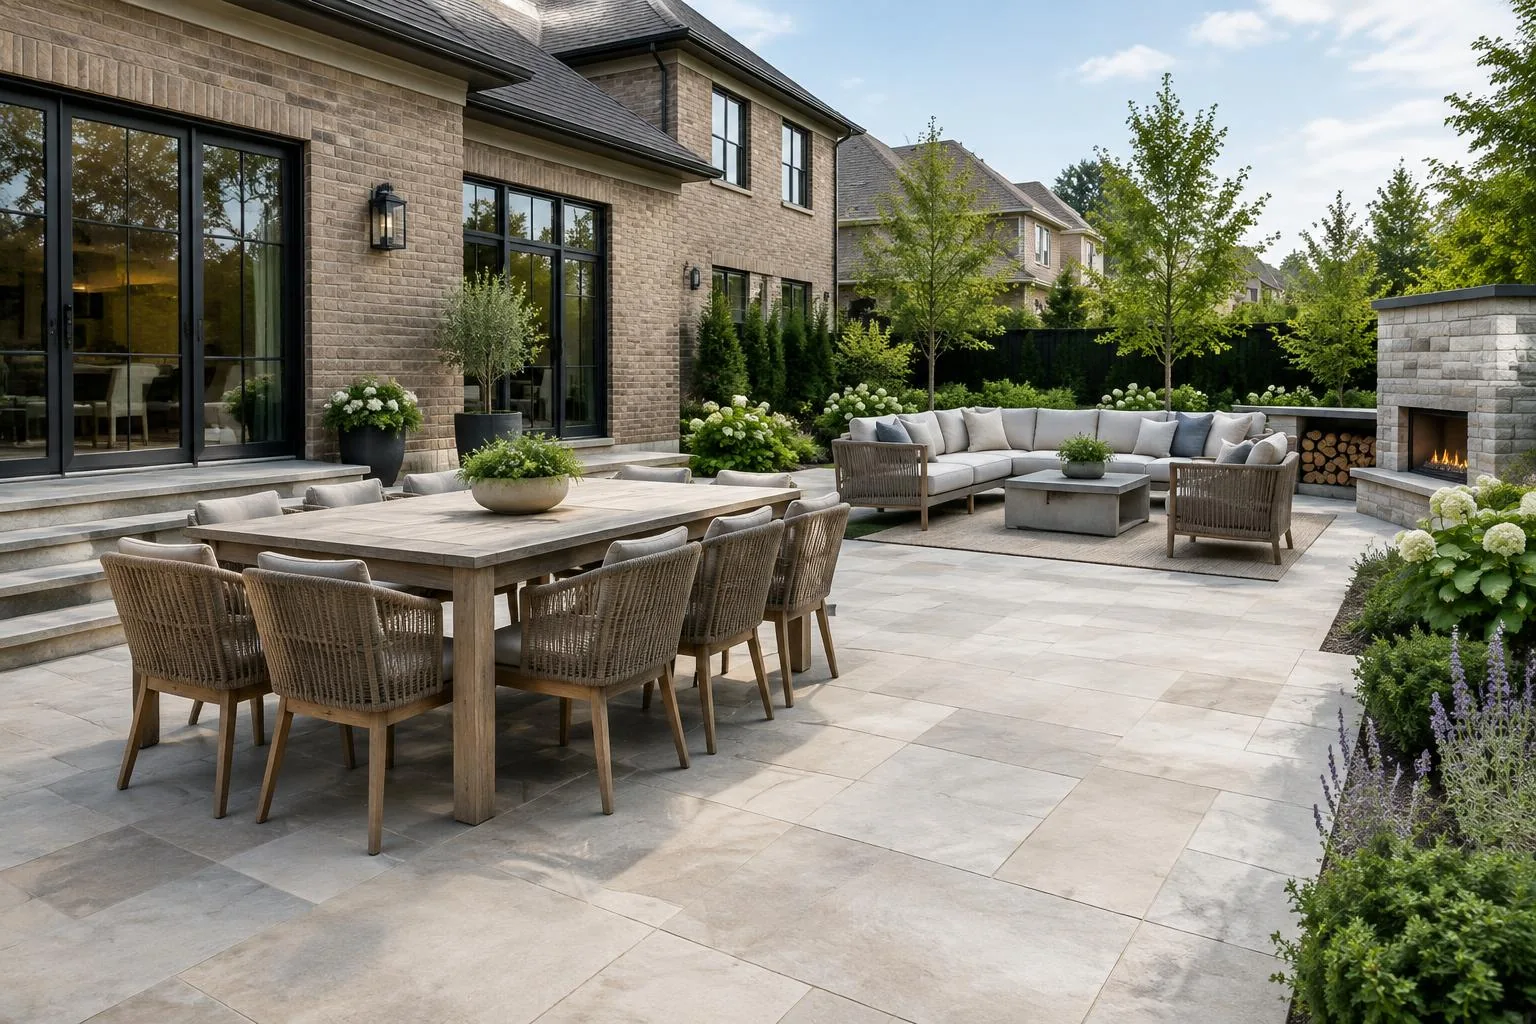
Interlock Patios in Hamilton & Halton
A patio is an outdoor room with a floor that needs to work for real furniture, walking routes and changing seasons. The size is shaped by how many people use it and where doors, planting, sun and grade changes make the space feel natural.
Step 1 of 6 — Firm soil base
Typical Ontario installed ranges (2026) for interlock patios are $25–$45 per sq ft; your exact price comes from an on-site quote. Pedestrian paving commonly sits on a 6–8 in compacted base with 50–60 mm pavers, bedding and edge restraint. A simple open pad takes a different amount of planning and construction time from a patio with steps, walls and drainage.
A surface made for the way you use it
- Families who want space for a dining table and a separate lounge
- Backyards where a lawn-only layout leaves the door without a landing
- A sloping yard that benefits from coordinated walls, steps and planting
- A deck and garden that need an accessible paved connection
Design options
See the pattern and the detail
Pick a Techo-Bloc or Unilock stone, then choose its colour, laying pattern and border. Every layout is drawn to scale from the manufacturer's real unit sizes.
This preview is drawn to scale from the manufacturer's real unit sizes, so the colour, pattern and border match what arrives on site.
Techo-Bloc · Slab
Blu 60
Clean modular slab for patios, walkways and pool decks.
Pedestrian slab — patios, walkways and pool decks. For driveways, the same look comes in Blu 80.
- Units in this pattern
- 6½×13, 13×13 and 13×19½ in
- Thickness
- 60 mm
- Use
- DrivewaysNot rated
- Patios & walkwaysSuitable
Illustrations are drawn to scale from published unit sizes; on-screen colours and textures are approximations and vary with screen, production batch and light — we bring physical samples to your design consultation. Techo-Bloc® and Unilock® and their product names are trademarks of their respective owners; Antoine Landscape Contractors is an independent installer.
- Large-format slabs create quiet planes around furniture, while smaller units can articulate a threshold or path.
- A mixed-size ashlar layout softens a broad paved area without relying on many contrasting colours.
- A border can separate a dining zone from planting or mark a transition to a walkway.
- Material samples should be considered in both sun and shade: a pale slab, dark accent and natural flagstone change character across the day.
Plan the investment
$25–$45 per sq ft · Typical Ontario installed ranges (2026); your exact price comes from an on-site quote.
What shapes the quote
- Dining and lounge layouts change the overall paved area and cuts.
- Retaining or seating walls and steps are quoted separately after measuring grade.
- Drainage, poor access and old-surface removal affect preparation.
- Large-format units, natural stone and porcelain require product-specific handling.
Built from the ground up
What's under an interlock surface
Everything below the pavers — the compacted stone base, the sand bed and the edging — is what keeps the surface flat for decades.
Driveway: Typical dig: about 12–16 in below the finished surface.
- Pavers: Usually 80 mm (3⅛ in) thick for vehicle loads. Thicker units spread tire loads and resist cracking.
- Joint sand: Polymeric sand swept into every joint. Locks the pavers together and keeps out weeds and ants.
- Bedding layer: About 1 in of screeded sand. A flat, even bed the pavers are set into — never used to fix low spots.
- Granular base: 8–12 in of crushed stone, compacted in lifts. This is what carries the weight. Compacting in thin layers stops it settling later.
- Geotextile fabric: Where the soil needs it (common on Hamilton clay). Keeps the stone base from sinking into soft clay over time.
- Native soil: Excavated, levelled and compacted. A firm, properly sloped subgrade so water drains instead of pooling.
- Edge restraint: Spiked along every open edge. Holds the outer pavers so the surface can't creep apart.
Patio & walkway: Typical dig: about 9–12 in below the finished surface.
- Pavers or slabs: Typically 50–60 mm (2–2⅜ in) thick. Foot traffic needs less thickness than a driveway.
- Joint sand: Polymeric sand swept into every joint. Locks the units together and keeps out weeds and ants.
- Bedding layer: About 1 in of screeded sand. A flat, even bed the pavers are set into.
- Granular base: 6–8 in of crushed stone, compacted in lifts. Spreads the load and stops low spots forming.
- Geotextile fabric: Where the soil needs it (common on Hamilton clay). Keeps the stone base from mixing into soft clay.
- Native soil: Excavated, levelled and compacted. A firm, properly sloped subgrade.
- Edge restraint: Spiked along every open edge. Holds the outer pavers so the surface can't creep apart.
Permeable: Usually deeper than standard interlock — the stone layers also store rainwater. Depth is set by the design.
- Permeable pavers: Units with wider joints that let water through. Rain soaks in at the surface instead of running off.
- Joint aggregate: Small clear chip — not polymeric sand. Open joints keep the surface draining.
- Bedding layer: About 2 in of small clear chip. Sets the pavers while letting water pass straight through.
- Open-graded stone: Clean, washed stone with open spaces. Holds water temporarily while it soaks into the ground.
- Sub-base reservoir: Larger clean stone — depth set by design. Extra storage for heavy rain; an underdrain carries overflow away where clay drains slowly.
- Native soil: Tested and graded, left uncompacted where it should absorb water. Water infiltrates here, or drains through the underdrain on clay.
- Edge restraint: Spiked along every open edge. Holds the outer pavers so the surface can't creep apart.
Why the base matters in an Ontario winter
| Granular base | 6–8 in, compacted in lifts |
|---|---|
| Paver thickness | Typically 50–60 mm |
| Bedding | Approximately 1 in screeded layer where applicable |
| Edge restraint | Matched to the pavement edge and adjoining material |
| Joints | Polymeric sand where compatible with the selected product |
| Slope | Direct surface water away from the home; confirm site grades |
Measure the furniture before the paving
A dining zone needs space not only for the table but also for chairs pulled back and a route around seated guests. A lounge group asks for different clearances, views and privacy. Marking those footprints on the ground helps avoid a patio that photographs generously but feels cramped when occupied. The barbecue should sit where smoke, circulation and service access make sense, rather than simply filling an awkward leftover corner.
Give each zone a reason to exist
Some households need one compact place to eat outdoors; others benefit from a sunny breakfast spot and a quieter evening seating area. Changes in paver size, a restrained border or a planting strip can define zones without building walls everywhere. Sun direction, tree roots, existing doors and a future deck should be assessed together. A continuous route from the house to the garden is often more useful than an oversized single slab of paving.
Grade is a design material
A sloped backyard can be addressed with a considered transition instead of forcing the entire site flat. A retaining or seat wall may hold a patio level and provide an informal edge; steps can connect a second lawn or garden terrace. Those supporting elements change drainage and the construction scope, so they are quoted after a site review. When a wall is needed, its foundation and water management deserve the same attention as the patio above it.
Keep water moving away from the house
The patio threshold must be coordinated with door sills, foundation conditions and existing downspouts. A finish that appears level to the eye still needs a planned route for rainfall. On a constrained site, the solution may involve grades or drainage work outside the paved rectangle. We examine where water currently collects and where it can responsibly leave the surface, including the way a neighbouring garden or lower lawn may be affected.
Choose the right character
Interlocking units can be lifted for localized repair, while large-format slabs give the garden an architectural simplicity. Natural flagstone introduces irregular edges and texture; porcelain has a precise appearance and needs an application-appropriate foundation and product. A dry-laid stone assembly and a rigid mortared installation behave differently under seasonal movement. Material choice should follow intended use and base design, not a claim that one product can never move or require attention.
Light and fire need their own plan
Low-level lighting can define a step, seating edge or the walk back to the house. Electrical routing is easiest to consider before the base is closed. A fire feature may be a focal point, but setbacks, heat clearances and ventilation depend on the product, surroundings and local rules. Confirm clearance and use requirements with the municipality and manufacturer before fixing its location, especially near decks, fences, planting or covered areas.
Make the patio and deck work together
A raised deck can provide a direct door-level platform while a stone patio creates the ground-level gathering area. Transition steps and shared material colours help the two read as one landscape without trying to make them identical. A low wall, planting bed or carefully lit path can separate functions while preserving movement. If the deck may come later, allow space for its footings, stairs and shade pattern in the patio concept now.
Seasonal care starts with the joints
Sweep leaves before they stain a light surface, clean spills with product-appropriate methods and watch for joint loss at exposed edges. After winter, inspect where water may have pooled or lifted a course before merely adding sand. Sealing is a material-specific choice, not an automatic step for every patio. Follow each manufacturer's directions for cleaning and any finish; avoid aggressive pressure washing that removes jointing or damages a textured face.
Do I need approval?
Backyard patios usually do not need a building permit, but grading, drainage, green-space and lot-coverage limits, conservation-area restrictions, and any associated wall or raised structure can change the answer. A fire feature has its own product and local clearance rules. Confirm current requirements with your municipality and the feature manufacturer.
Confirm current requirements with your municipality.
From site visit to final joint
- 01
Design consult & measure
- 02
Survey, grades & approvals
- 03
Ontario One Call locates
- 04
Excavate to the right depth
- 05
Geotextile where needed; compact granular base in lifts
- 06
Bedding & screeding
- 07
Lay pavers, cut & set borders
- 08
Edge restraint & polymeric sand
- 09
Final compaction, cleanup & walkthrough
Materials we install
Techo-Bloc, Unilock, Permacon pavers and slabs, natural stone and porcelain. Product selection depends on the intended load, finish and manufacturer's installation guidance.
Keep the surface working well
- Remove leaves and barbecue spills before they settle into joints or textured faces.
- Check joints and edge courses after winter; investigate movement and drainage before renewing sand.
- Use manufacturer-approved cleaning and sealing products rather than a universal chemical treatment.
Common questions answered
Patios questions
What is the typical cost of an interlock patio?
Typical Ontario installed ranges (2026) are $25–$45 per sq ft; your exact price comes from an on-site quote. Walls, steps and drainage are site-specific.
How big should a dining patio be?
Begin with the actual table and chairs, including room to pull chairs back and pass behind them. Then test the layout on site.
Can a patio be built on a sloped yard?
Often, with a grade-aware layout that may include steps or retaining walls. Drainage and wall design must be assessed together.
Is large-format stone suitable for every patio?
Large units need a properly prepared base and product-specific installation. Compare them against smaller interlock and natural stone for the site.
Do I need a backyard patio permit?
A ground-level backyard patio usually does not need a building permit, but grading, drainage, coverage and conservation rules may apply. Confirm current requirements with your municipality.
Can you connect an interlock patio to a deck?
Yes. Coordinate the height transition, stair location, drainage and shared circulation before either surface is installed.
Should a new patio be sealed?
Not always. Whether sealing suits a surface depends on the product and desired finish; follow manufacturer care instructions.
What about a fire pit near the seating area?
Confirm local rules and the maker's clearance guidance before committing to a location near structures, planting or fences.
Complete the landscape
Driveways
Explore →Walkways
Explore →Steps & Entrances
Explore →Pool Surrounds
Explore →Permeable Pavers
Explore →Natural Stone & Porcelain
Explore →Repair & Relevelling
Explore →Cleaning & Sealing
Explore →Add a fire feature
Explore →Retaining walls
Explore →Decks
Explore →Fences
Explore →Christmas lighting
Explore →Design & build
Explore →Working in Hamilton, Burlington, Oakville and Ancaster, including surrounding neighbourhoods and communities.
Tell us about your patios
Share the address, approximate dimensions and what you want to change. Your exact price comes from an on-site quote.